

We are surrounded by smart appliances like smart bulbs, switches, TVs, blenders, you name it. To control these appliances we need an app or a centralized device. SONOFF recently launched NSPanel which is a smart scene wall switch on Kickstarter. It acts as a central hub for all our smart devices.
In this article, I have shared unboxing, first impression and setup of SONOFF NSPanel. Here you will also find my final review with pros and cons. So you can decide if this product is for your home. Now let’s dive into it.
Unboxing the SON OFF NSPanel.
So here’s what we get in the box:
- NSPanel Smart Wall Switch.
- User manul.
- Two mounting screws.
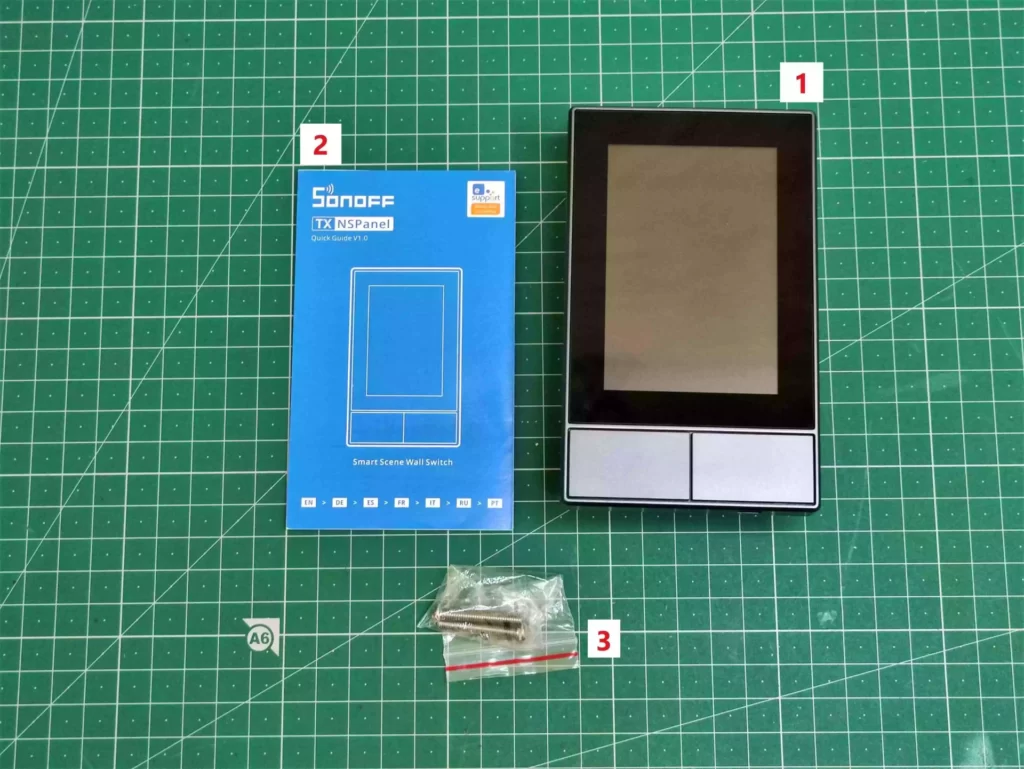
So that’s all we get the box. The manual explains all the basic dos and don’ts for the product along with basic instructions. Here I have the US panel but you can also get an EU panel that has similar specifications.
Specifications:
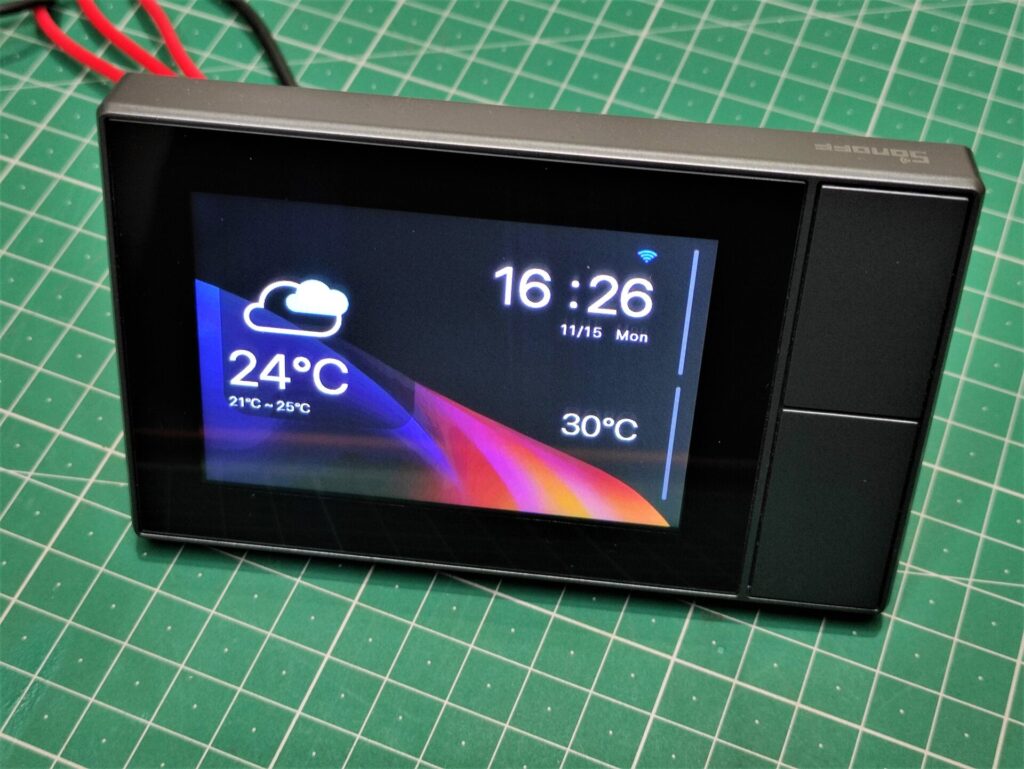
Here we get both WiFi and BLE 4.2 along with a 3.5″ capacitive touch screen. Below I have shared other specifications offered:
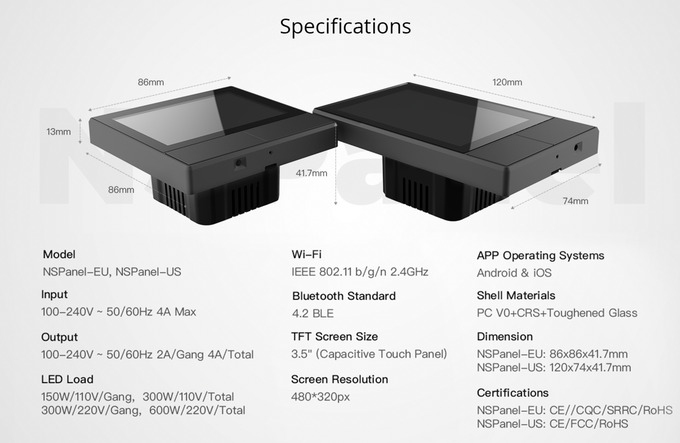
The panel also houses 2ch control which can handle 4A draw. And a temperature sensor to monitor room temperature.
NSPanel Wiring Diagram.
Let’s see how to power up the device and connect two appliances. We will connect 2 lights initially because NSPanel is rated for 4A and we don’t want to cross that limit. Refer to the following diagram:
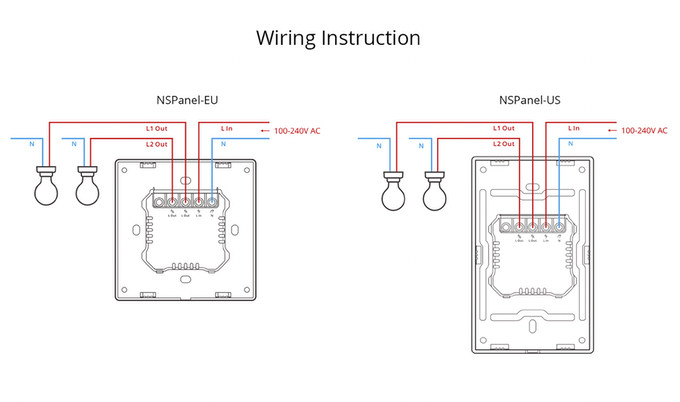
Note that in order to work the NSPanels require a Neutral connection. Both EU and US panels are compatible with 240V 60Hz so they should work everywhere.
For connecting the lights, we have to connect one wire (Live) to the OUT terminals. Connect the second wire to Neutral.
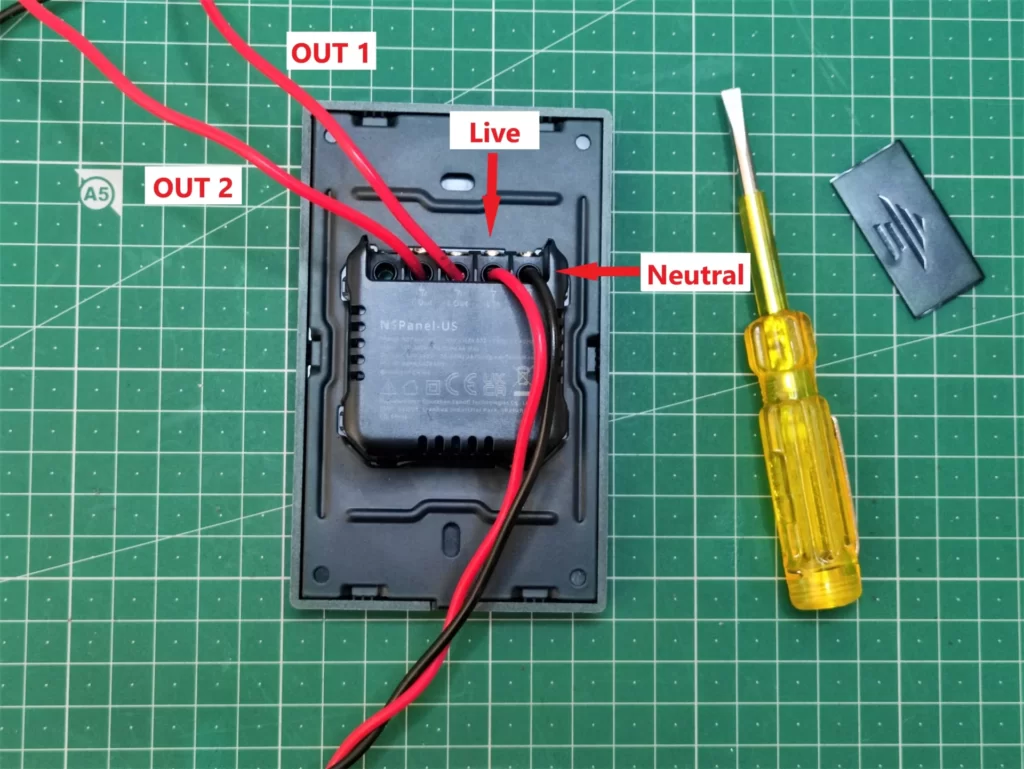
By connecting the Live and Neutral to the socket, the NSPanel turns on directly. There is no ON/OFF switch. Once the panel is on, it will go into setup mode. Now we have to set up the smartphone app and connect it to the Panel.
Smartphone App Setup.
To set up our NSPanel we will use the eWeLink app. You can find it on Google Play Store or Apple App Store.
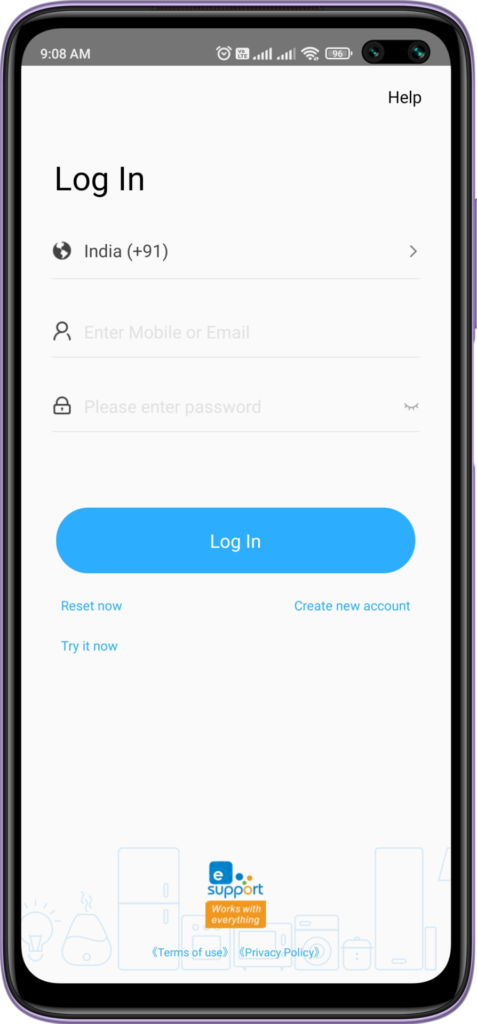
Login Page.
The first screen that appears requires us to login into the app. If you already have an account, you can log in or you can create a new account. There is another option as well which lets us use basic features without having to create an account at eWeLink. But this guest mode does not save any data like devices, states or other settings on the cloud. So if you reinstall the app or delete the local data, you will have to start over again.
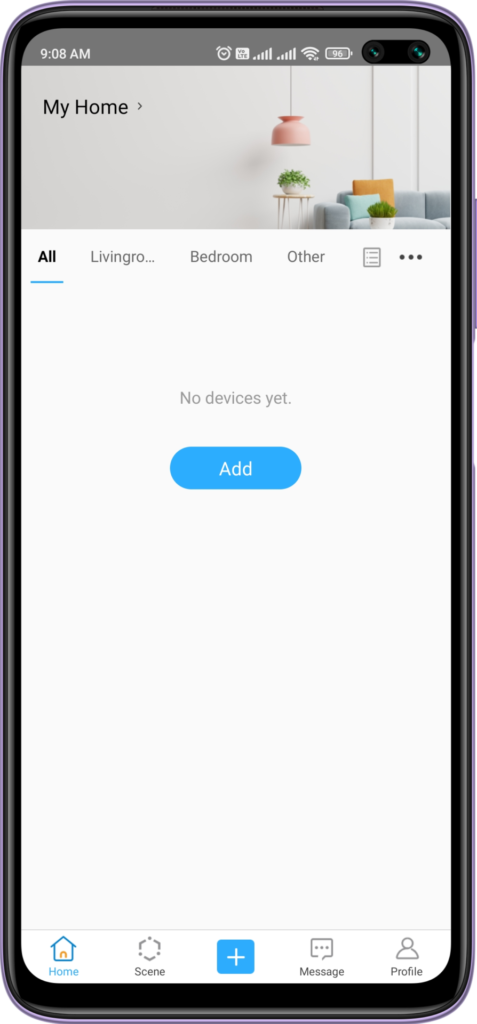
Add New Device.
As new users, we will get a blank device page. All the smart devices we add will be listed here. To add a device we can click on the “Add” button or the “+” button at the bottom. this will take us to the next page where we can select the pairing method.

Device Pairing.
Here we select “Bluetooth Pairing”. Now the app will ask your permission to turn on Location and Bluetooth. Both of these are required.
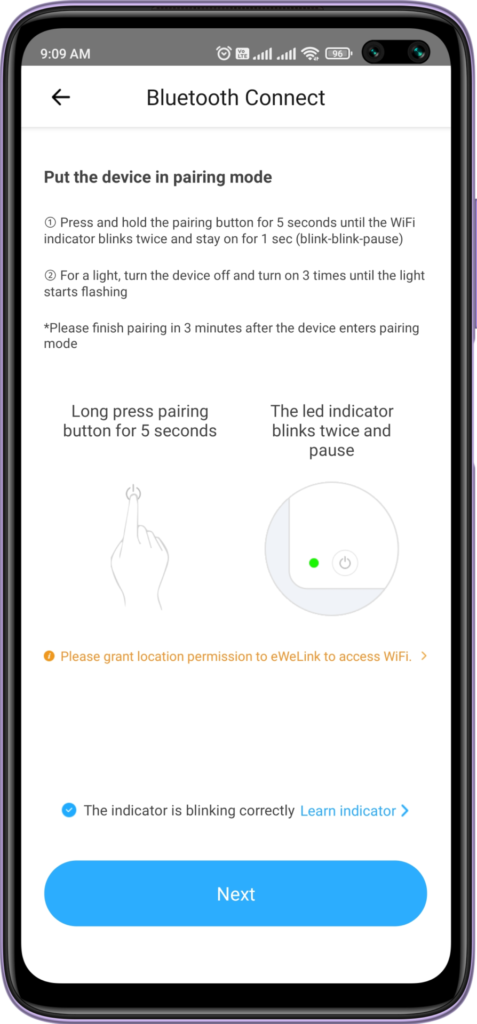
Enabling Pairing Mode.
This step needs us to enable pairing mode on the NSPanel. When the device is plugged in for the first time, the pairing mode is turned on by default. But in case it doesn’t’ just hold any one of the two switches on the NSPanel for 5 seconds to enable the pairing mode. Finally, tick at the checkbox and hit Next.
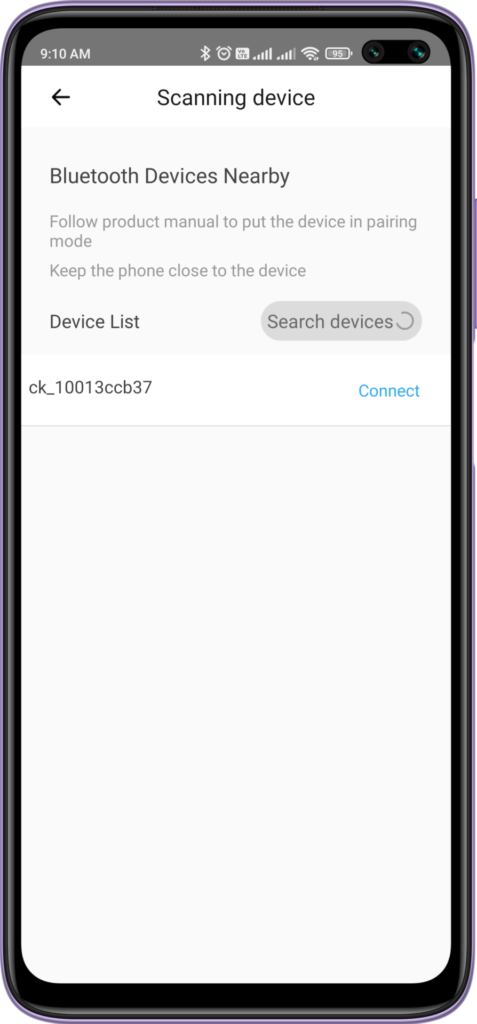
Scanning For Bluetooth Devices.
After clicking on “Search devices” It might take a few seconds or a minute for our smartphone to discover the NSPanel. Once it is discovered, it will be listed below. Now, all we do is click on connect and wait for the connection to be established.

Adding a WiFi Network.
This is an important step, here we will add our device to a wifi network. Once our device is discovered, we just have to login into it so our NSPanel is connected to it. This will allow all our smart devices to be controlled via NSPanel.
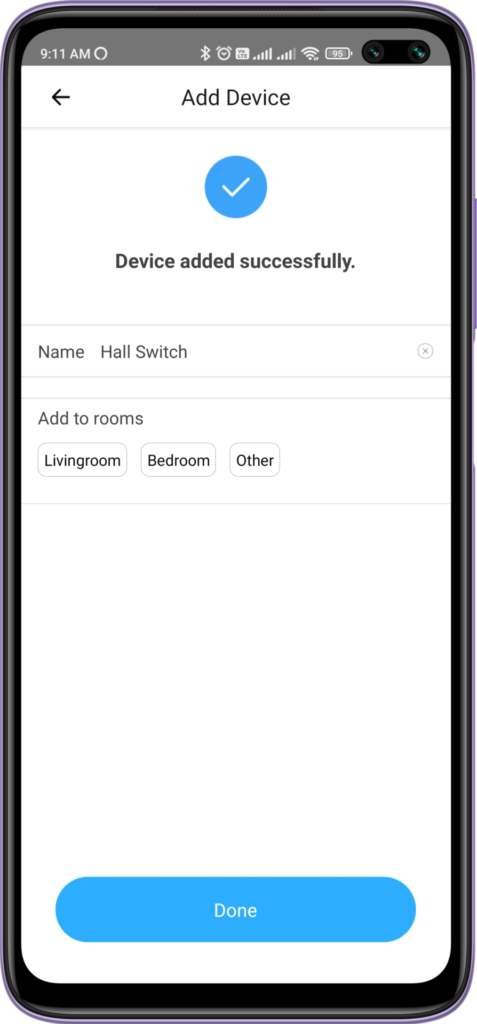
All Done.
Now that NSPanel is connected to the internet Just click on “Done” and you will be redirected to the home screen. Here a new device will be added. We can now control the two lights via the physical switches or through the app.
Testing The NSPanel.
As seen in the video above, the lights can be controlled using the physical buttons and the eWeLink mobile app. Both methods are interconnected so we can use either one.
Now that we have seen what NSPanel is, how to set it up and how to start using it. We can move on to my review part.
Review of SONOFF NSPanel.
So after the setup, I used the NSPanel on my desk for testing. It has been 2 days of testing and here is a list of all the pros and cons I have noticed during this period. I would like to mention that during this time the NSPanel received one and the eWeLink app received two updates.
Pros of SONOFF NSPanel.
1. Good build quality: The first thing I noticed after getting it out of the box was that it feels good and solid. It is well built and I am sure will last long. It’s made of plastic but of good quality.
2. Easy to setup: As you can see from the instructions above, the setup process is very easy and straightforward. It takes less than 30min to get it up and running.
3. Smooth functioning UI: The software side of the NSPanel is very smooth. I never saw it lag or stutter when using the UI. It can be a result of simple and animation free design. The look of the user interface is very similar to Android so using it does feel familiar.
4. Compatibility with Alexa and Google Assistant: Soon as the setup process was over Alexa discovered the new smart device on the network and with a few quick steps, I was ready to use lights over voice commands. I am planning to write more about it in the future post.
5. Compatibility with SONOFF Products: It will not come as a surprise that NSPanel is compatible with all other SONOFF smart devices like smart plugs, switches and relays.
Cons of NSPanel.
With all the pros also comes some cons and NSPanel is no different. after using it for 2 days, I noticed a few issues. The first thing I noticed was the display. Though the screen is very responsive the actual LCD panel is not of the best quality. It has poor viewing angles and the colours are a bit off. Not a deal-breaker but something I thought should be mentioned. Apart from that, there are some software issues I have listed below.
1. Inaccurate Temperature: The Panel comes with a built-in temperature sensor for motoring room temperatures. The problem is it is affected by the internal temperature of the power supply.
2. Problem with Time: The panel displays the current time and date but there is no option to set the time manually. It registers the time based on location which could be a bit off. For me, the difference is of 30min.
3. The app crashes: The eWeLink app works well but when changing settings it crashed a lot. This could be a problem with only my device but something to be noted.
And that’s about it. I did talk to Itead.cc team about these issues and they assured me that the problems will be fixed with software updates.
Finally.
So that was my review about NSPanel. Overall I liked the system but it does need to fix some bugs. You can check out more information or buy NSPanel for yourself from the following link.
SONOFF NSPanel Smart Wall Switch – $74.90
If you liked this tutorial and review and would like to read more posts like this, do subscribe to receive the latest updates.
Do check out our previous posts if you haven’t already:
5 thoughts on “SONOFF NSPanel Smart Scene Wall Switch”
I hope the date field can be formatted in a different way? The eleventh of the fifteenth month isn’t really a thing.
The NSPanel used here is the US unit. I think the Europen unit will have the format in dd/mm.
for now, there is no way to change the format.