
A few weeks ago I received a package from Sonoff with two of their new products, the Mini R3 and S-Mate. I have been using them for quite some time now and now I can share my review about the same. Previously I have covered Sonoff’s NSPanel, do check it out if you haven’t already. Below I have shared what we get in the box, how to put it together and my review with pros and cons. So let’s get right into it.
- Sonoff Mini R3: (Amazon US / Amazon UK / Banggood)
- Sonoff S-Mate: (Amazon US )
- NS Panel: (Amazon US / Amazon UK / Banggood)
What’s in the box?


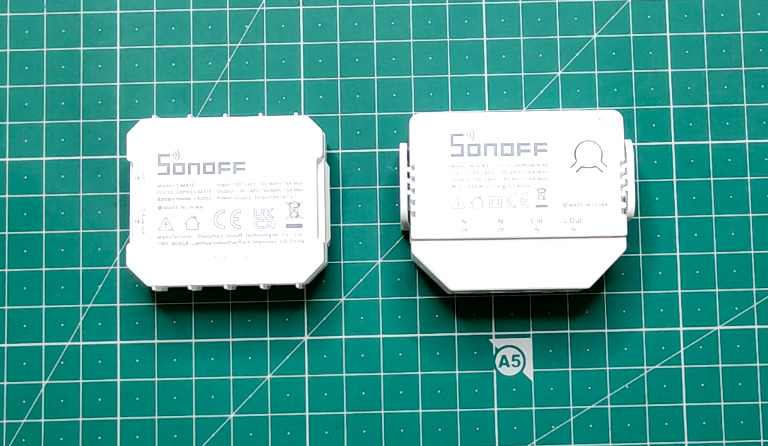
So in the package, I received these 2 boxes, Which contained just the Mini R3 and S-Mate along with a user manual. The manual is well instructed along with pictures and multiple languages so setting it up gets fairly easy. After unboxing the products now let’s see how I set them up.
CAUTION: These are AC products, AC is dangerous to work with, accidental shocks can be fatal. If you are new or have no prior experience with AC power, Get a professional to install it for you.
Sonoff MINI R3.
Sonoff MINIR3 is a DIY mini smart switch that can be used to turn ON/OFF connected appliances. Paired with the eWeLink Smart app, MINIR3 can remotely toggle appliances through switches or scheduled timings.
Specifications:
| Model: | MINIR3 |
| Input: | 100-240V — 50/60Hz 16A Max |
| Output: | 100-240V — 50/60Hz 16A Max |
| Max load: | 3500W |
| “eWeLink Remote” receiving distance: | Up to 50M |
| Operating systems: | Android & iOS |
| Wi-Fi: | IEEE 802.11 b/g/n 2.4GHz |
| Shell material: | PC VO |
| Dimension: | 54x45x24mm |
Setting up MINI R3.


- First remove the cover over the screw terminals. It seemed very easy according to the guide. but was a bit harder. I used a flat-head screw driver to slide in the connection hole and then applied some upward force. The cover popped high indicating the tight fit.
- After removing the cover, we can see that there are 4 screw terminals labled as N, N, L in, L out. Here we can see there are 2 Nutral and a Live in and out terminals.
- Now we just make the connections as per the manual. Here I have hooked up a single bulb for demonstration.
After successfully installing the MINI R3, We now move on to setting up the eWeLink app. You can download the app for Android or iOS devices.
Setting up eWeLink app for MINIR3.

First, we need to create a new device, so we click on the add icon at the bottom. Notice that I already have a device added, if you are a new user this page will be blank.
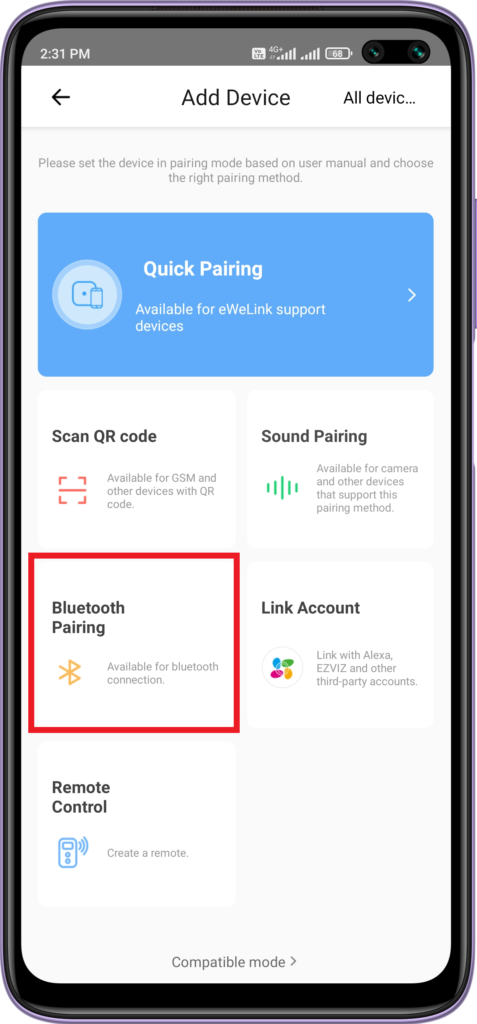
On the next page, we have to pair our MINI R3 with the app. To do so we need to click on “Bluetooth Pairing”. Make sure you have enabled Bluetooth on your smartphone and the device, in this case, MINIR3 is powered ON.

Now read the instructions on the screen very carefully. We need to put our MINI R3 in pairing mode. To do so, we press the button on the device for 5 seconds. You know it is in pairing mode when the LED blinks twice and pauses for a second. Then check the box of the indicator is blinking and click “Next”.
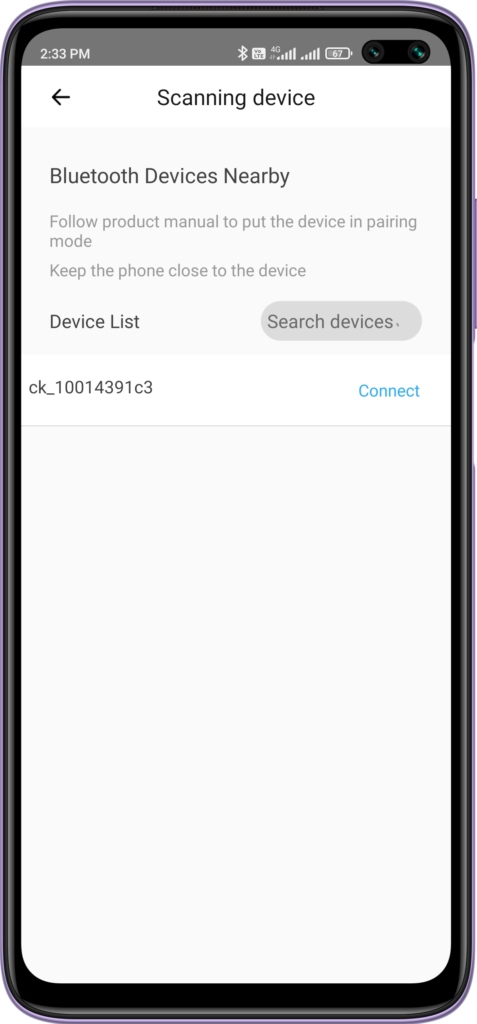
On this page, we see a list of Bluetooth devices, in this case, MINIR3. Just click on the device and wait for it to connect.

Now we have to connect the device to our WiFi network. Hence after a successful connection is established, This page lists available WiFi networks. Select your WiFi and enter the password so the device is connected to the network.
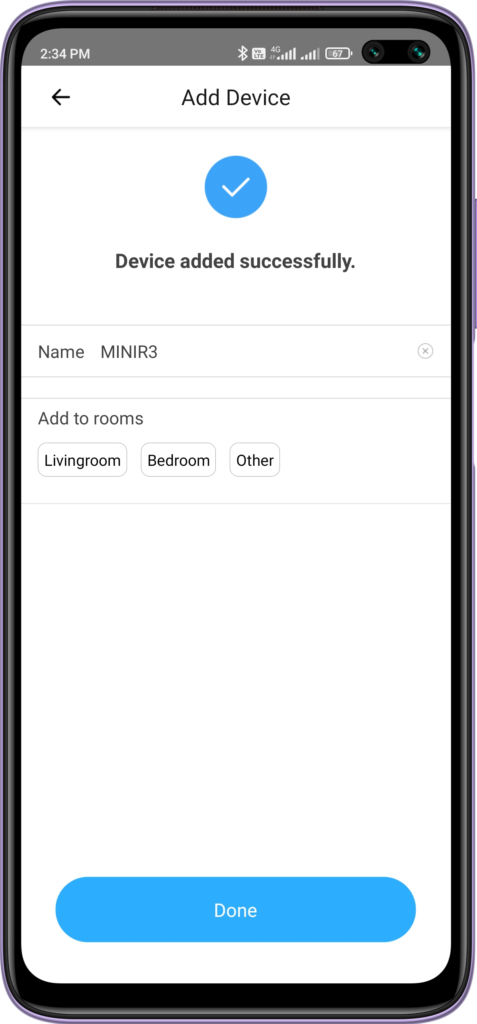
Once the device is successfully added, we can rename it to anything we want. And add it to a category as per the use. For testing, I kept the default name and settings.
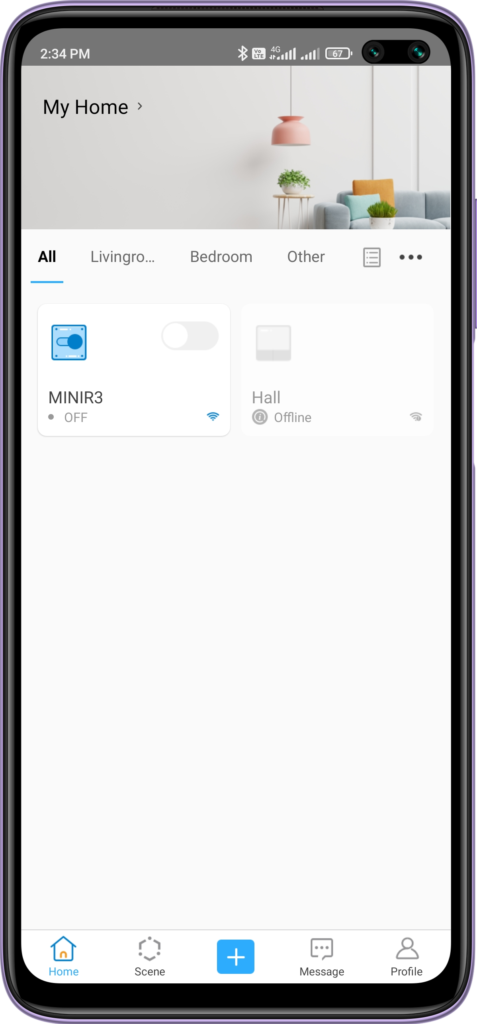
Now we can see a new device added to the page. The green dot on the device tile indicates that the device is online. We can now toggle the bulb from the switch on the device tile itself or the switch page.
Sonoff S-Mate
S-MATE connects to the ordinary 1/2/3-button wall switch which acts as a remote controller. Paired with MINIR3 it gives a wireless interface to toggle the appliances connected to 3 different MINIR3.
Specifications:
| Model: | S-Mate |
| Power Supply: | 3V Button Cell |
| Battery model: | CR2032 |
| Input: | 100-240V ~ 50/60Hz 16A Max |
| Output: | 100-240V ~ 50/60Hz 16A Max |
| Working Temperature: | -10°C~40°C |
| Shell material | PC |
| Dimension | 54x45x24mm |
Setting up S-Mate.


- Similar to the MINIR3, the first step to setup S-Mate begines with removing the back cover. Again, using a flat-head screw driver helps a lot. Just slide it into the grove on the side and gently pry open.
- Inside we can see a 3V Lithium battery that powers the S-Mate. We have to remove the plastic under it to activate the device.
- Finally just connect any switch to the S-Mate. Here ‘S’ is the common terminal and ‘S1’, ‘S2’, and ‘S3’ are for connecting swiches.
- For demonstration I have used only single button to control the Light connected to the MINI R3
Do refer to the user manual for more detailed instructions.
With that done, Now we can move to set up the S-Mate with the eWeLink app.
Setting up eWeLink app for MINIR3.
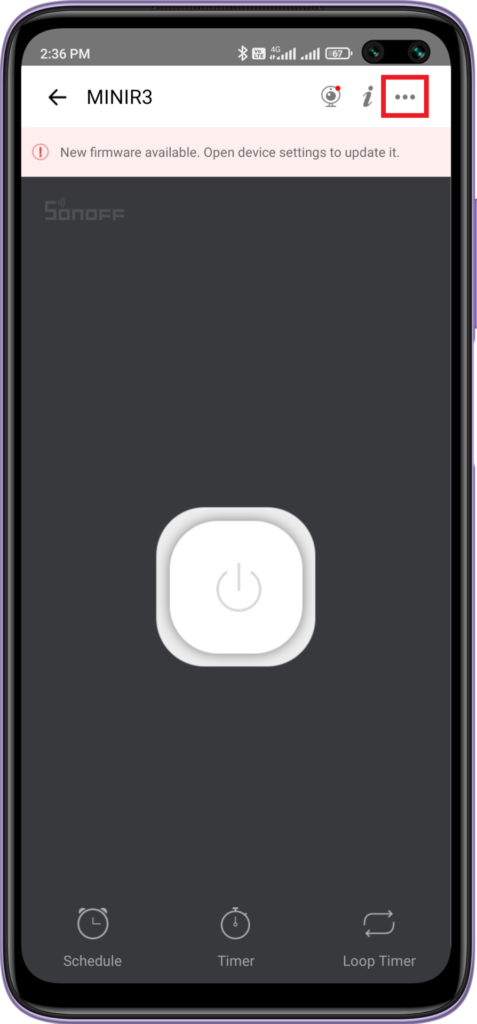
First, tap on the “Mini R3” tile to open this switch page. From here click on the menu option on the top right corner. Just like me, you might too get an update for the device. You can do that through the settings. just remember DO NOT press any buttons or unplug the device until the update is completed. Or you might risk bricking the device.
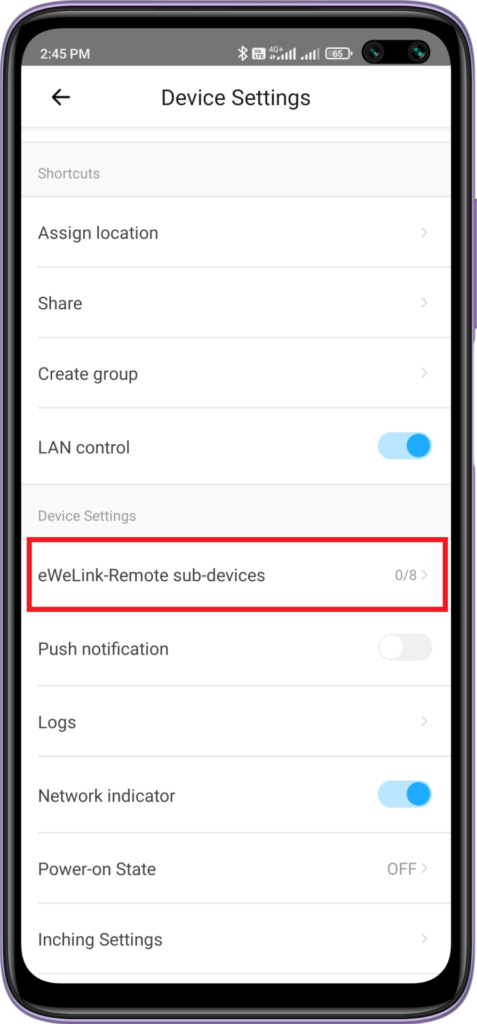
From the menu, click on this option. It will allow us to pair the MINI R3 with S-Mate. We can add up to 8 Sub-devices.
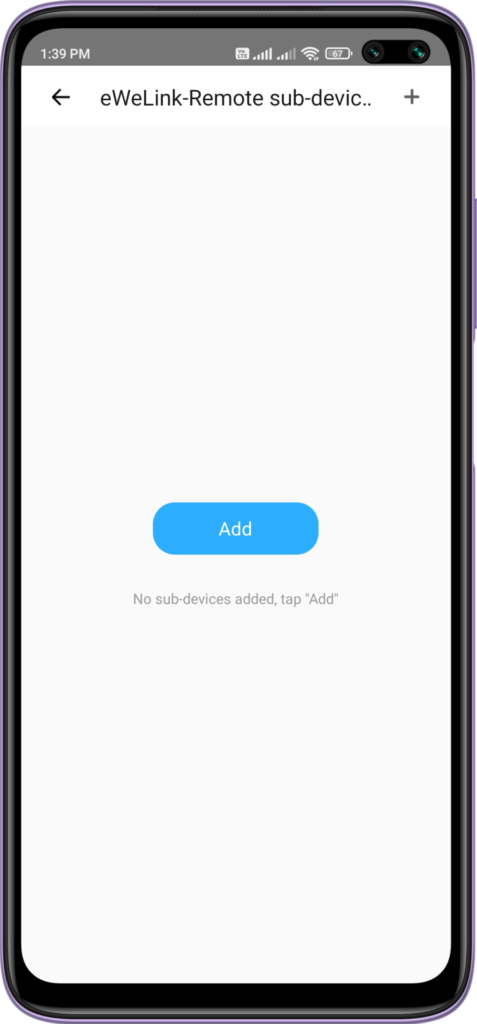
Here we have to add a new device. After clicking on Add, you will see a count down timer. During this time we have to toggle the switch on S-Mate once to register it with MINI R3.

Once the device is finally added, you can rename it as you like. And again give it a category to sort between devices. After everything is set, hit “Done”.
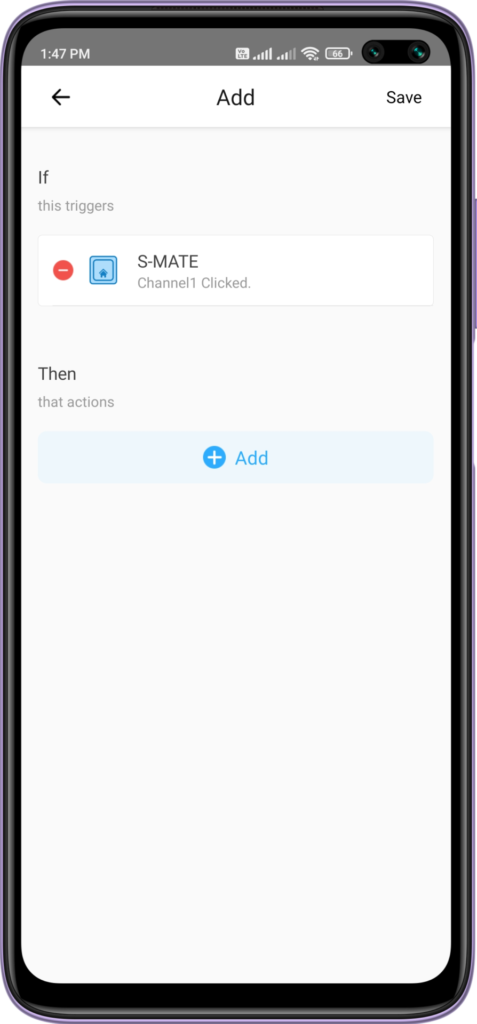
Finally, we have to create a Smart Scene to toggle the light remotely using S-Mate. To do that first head over to the Scenes page and click on add icon. Now first we select the “If”, Here select “S-Mate” and click on the channel you have connected to the Switch. Dor me it is “Channel 1”. After that just click “Click” and save the settings.
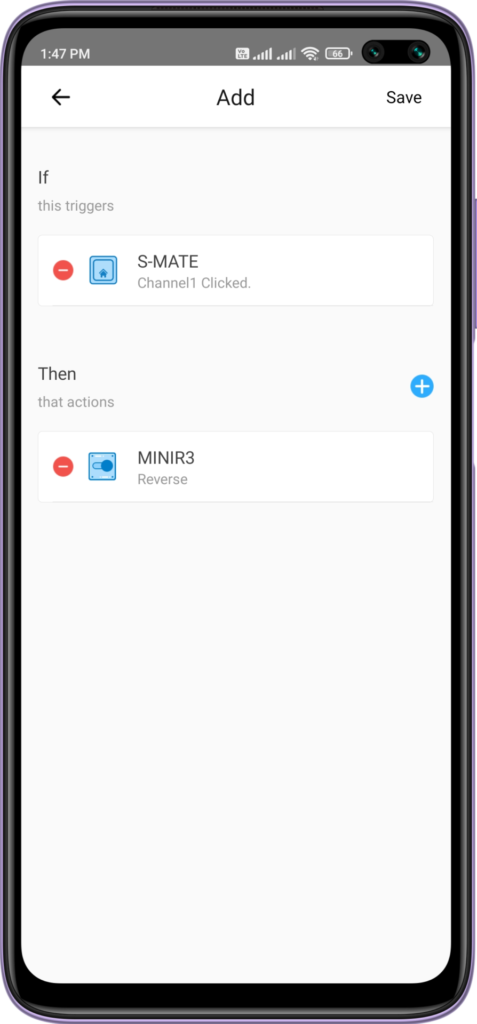
Now we have to make the “then” part. Just click on “Add” and select “MINIR3”. Select “Reverse” from the options and save it.
With that being done, We are now all set to control our device i.e light bulb using S-Mate.
Testing:
The video shared above demonstrates the working of MINI R3 with S-Mate. Along with this setup, we can also use it with the Smartphone app.
My Thoughts.
So I have been testing the MINI R3 and S-Mate for over a week now and here’s a Pros and Cons list I made.
Pros:
- Fairly easy setup process.
- With 16A support, MINIR3 is way better than the BASIC R2 I have been using for the past.
- S-Mate is a unique idea and again the setup process was fairly easy.
- Both the controlling options (App and S-Mate) are super fast.
Cons:
- So the very first thing that I struggled with was taking off the covers that hide both the screw terminals on MINI R3 and battery on the S-Mate. I think it can be made a bit easier. I had to use quite a bit of force and was afraid I would break it.
- Also I noticed, The MINI R3 lost connection with the app from time to time. I’m not sure if it is a hardware issue or a software issue.
- And finally I don’t understand need for direct connection between S-Mate and MINI R3 as I tried it and it never worked. Could be user issue but I thought I should mention it.
So that was my final impression on the MINI R3 and S-Mate. I hope you like this article and find it helpful. If you like the content like these, make sure you follow us on Facebook and Instagram.