

In this post, I want to introduce you to a STEM Robot kit by Keyestudio. Here I have shared: How to assemble the bot, set up the environment, and program it. So without wasting any more time, let’s get right into it.
Requirments.
Here are the things you will need for the build:
That’s all you will be needing.
What Is KeyBot?
KeyBot is an educational Robotics kit developed by Keyestudio which is marketed towards students for STEM (Science, Technology, Engineering & Math) education.
The kit consists of all the parts required to assemble a 2 wheeled drive robot along with a couple of sensors. This Robot is controlled with an Arduino compatible development board which can be programmed using Arduino IDE or Graphical programming interface via Mixly.
In the box, you will find a well put together manual with images and instructions. Along with the following components:
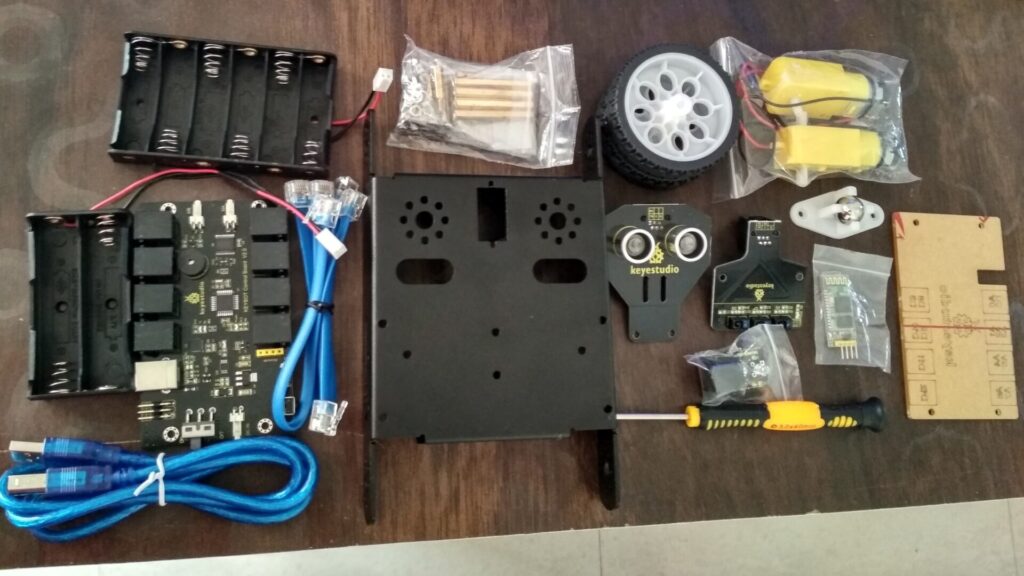
- Metal chassis.
- Two geared motors with wheels.
- A caster wheel.
- 2 types of battery holders. (AA and 18650, batteries are not included)
- A microcontroller board.
- A line follower sensor.
- An ultrasonic sensor.
- A single LED module.
- 3 RJ11 cables.
- HC-06 Bluetooth module
- All the required Screws, Nuts and Stand off’s.
- An Allan wrench and a Phillips head screwdriver.
The kit provides everything you will need to build the robot although I felt the need to use needle-nose pliers for holding the nut at some places.
Assembling the KeyBot.
I recommend you go through the manual as it is well put together.
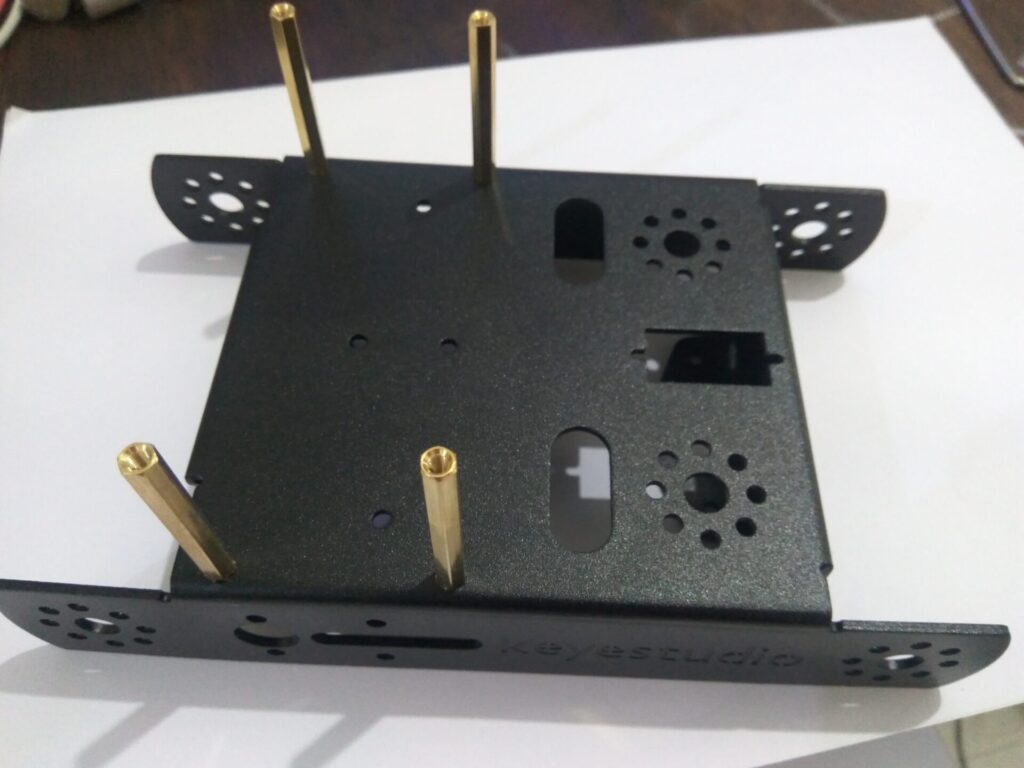
The first thing you need to do is attach the four 40mm spacers to the chassis using 8mm hex screws. These spacers will later hold the main controller board.
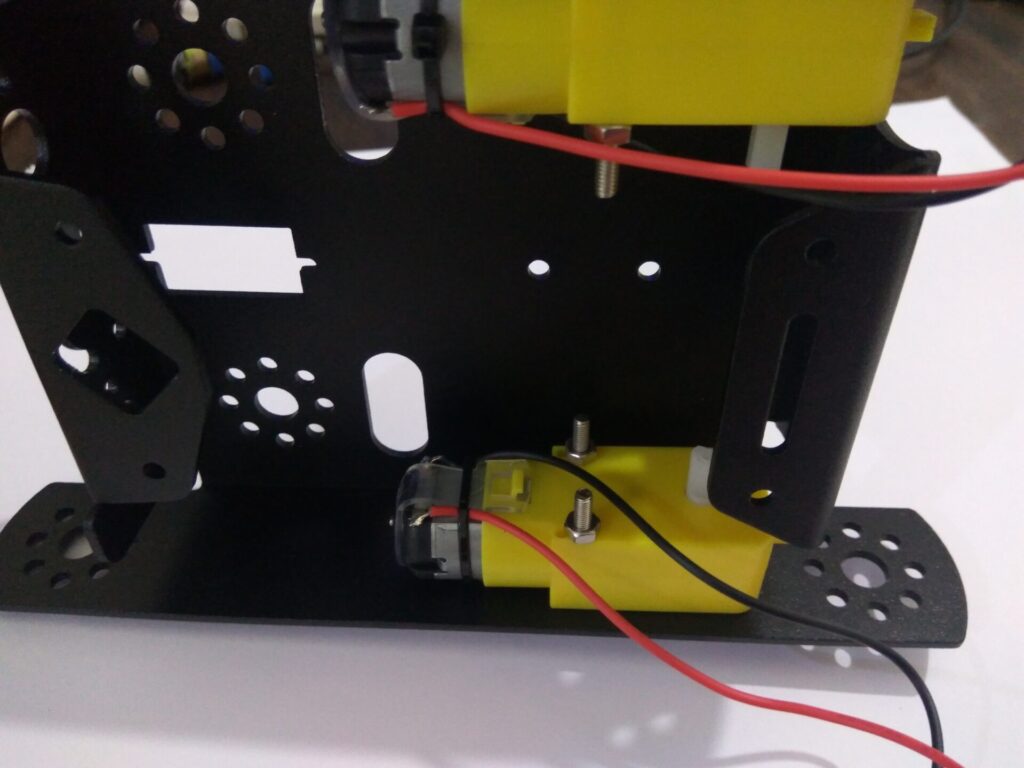
Next, attach the motors to the chassis using the 30mm round-head screws and secure them using 4 nuts.
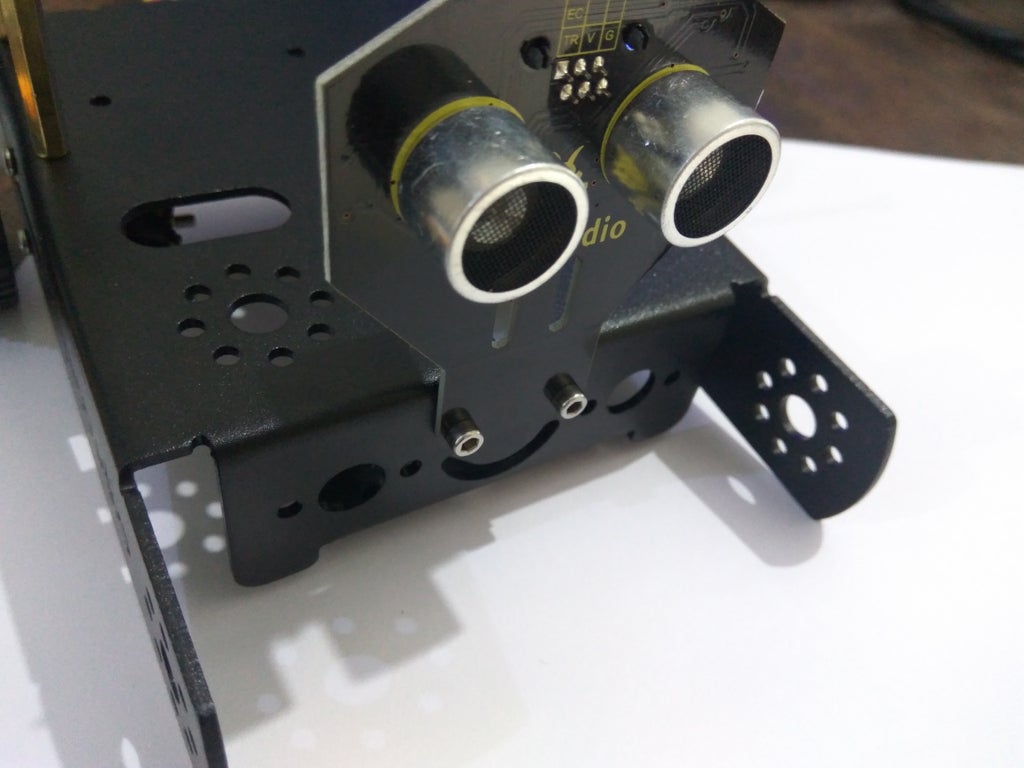
Then Mount the ultrasonic sensor using 8mm hex screws. The sensor mounts in the front and the screws are secured in place with nuts that goes around the back. Here I faced some problems as I was not able to hold the nut due to the extended part made to attach the caster wheel. To overcome this problem I used needle-nose pliers to hold the screws from behind and then tighten them with the Allan wrench.
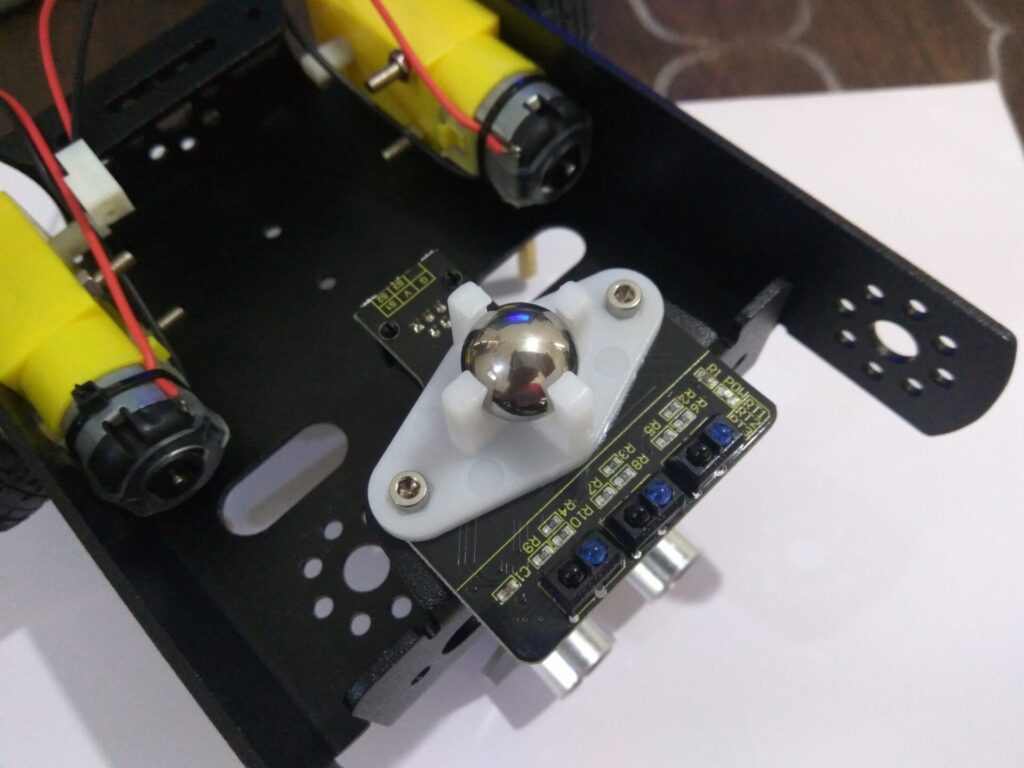
Next, mount the Line sensor and caster wheel. They go in together at the bottom. Place the line sensor first aligning the holes and then place the caster wheel on top. Again, fastening the nuts was not simple as I could not reach under there so used the pliers again.
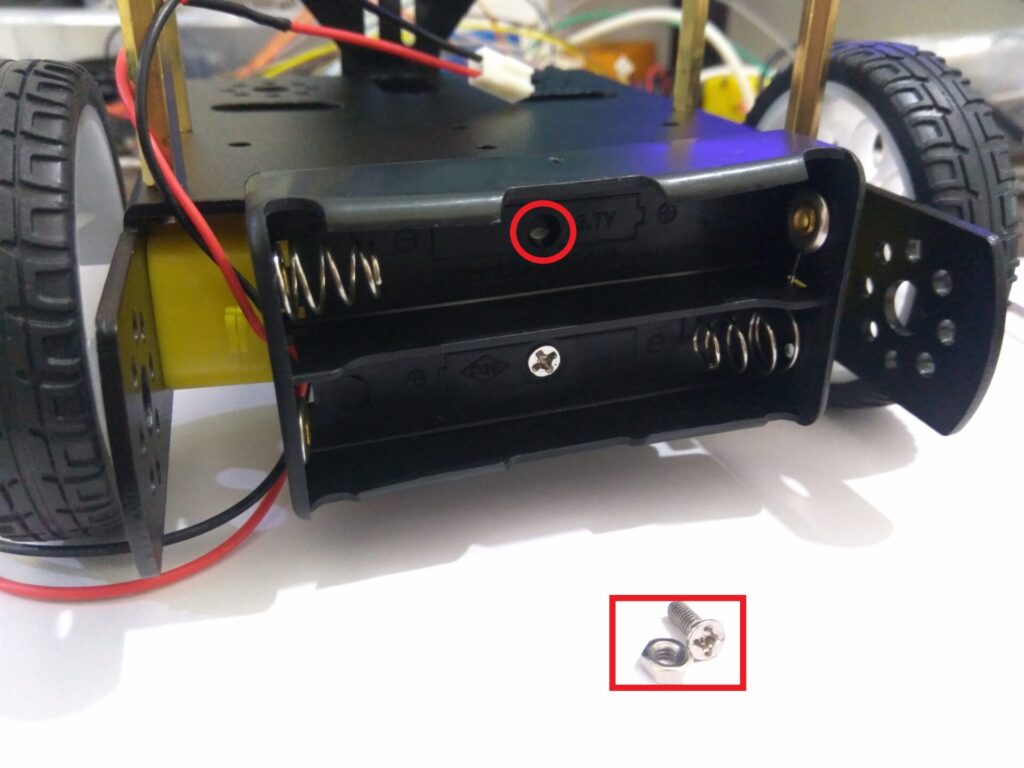
Next, attach the battery holder, here you have a choice whether to go for the AA holder or 18650 holders. I chose the 18650 battery holder as I already have those laying around and they last longer.
The battery holder is placed at the back and it is supposed to be secured using two 8mm flat head screws. Here again, pliers are required to hold the nut. After screwing and fastening the first screw I realized the second hole was not aligned with the hole on the battery holder. I removed the screw and tried to align the holes but couldn’t so I had to settle down for a single screw which isn’t the best solution but gets the job done.
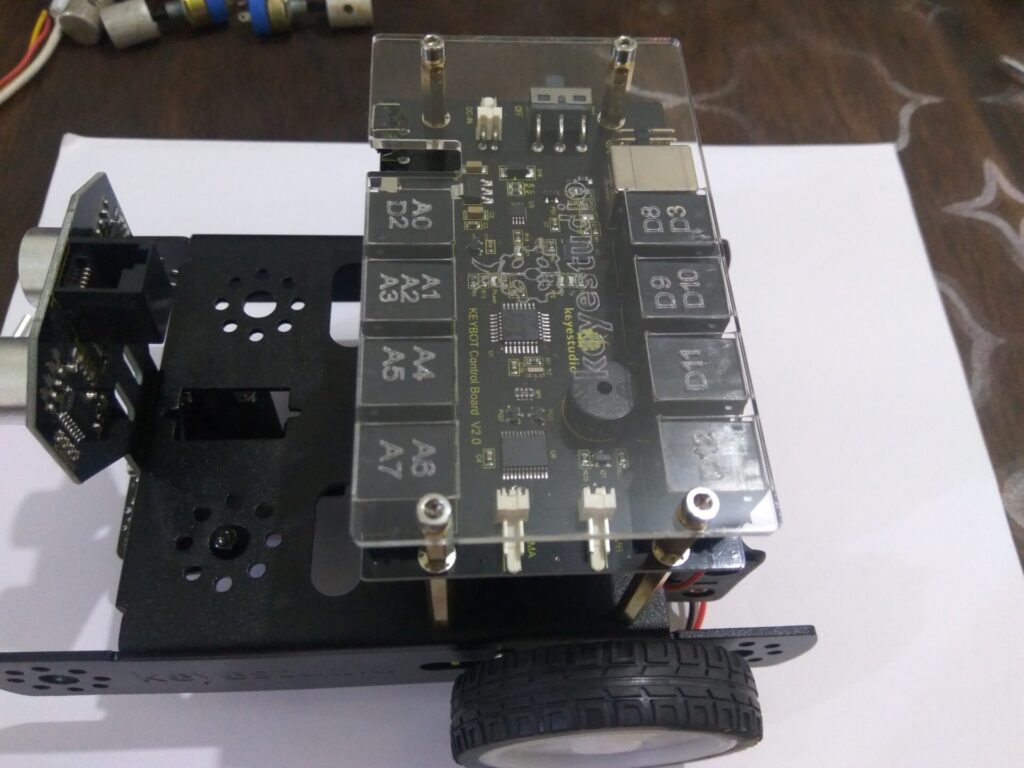
Then move on to install the control board. For this, you will need the 15+6mm standoffs. First place the controller on top of the 40mm pillars and then screw the 15+6mm stand off’s on top. There is an acrylic panel in the kit which is covered with paper, remove the paper and place the panel on top of the spacers and use 10mm hex screws to secure them. This panel has labels for the blocks. Refer to the image below to get a better look.
With that been done, The robot is fully assembled. Now we need to make the connections.
Making the Connections.
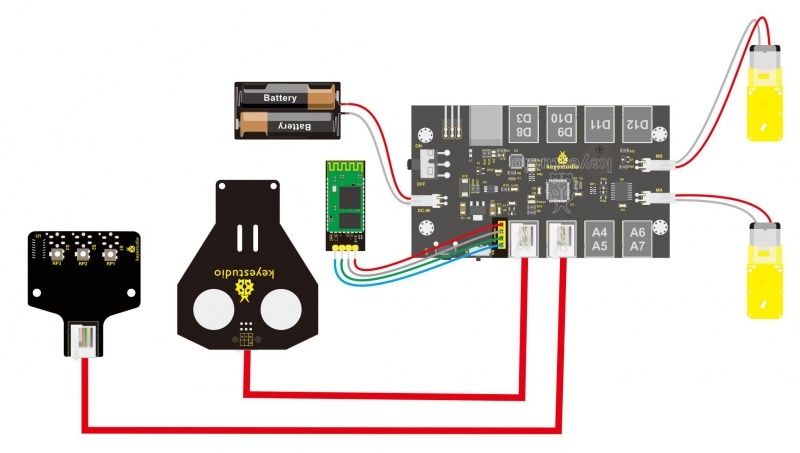
Connections are pretty simple, First, plug the motors into the JST connectors. Next plugin Bluetooth module.
I used the 10cm RJ11 cable to connect the ultrasonic sensor to A0 and the 20cm cable to connect the Line sensor to A1. The battery holder pin is plugged into the JST connector near the on/off switch.
Refer to the manual or the image below for more information.
For a more detailed assemble you can refer to Keyestudio’s Wiki page here.
Now, all we need to do is program the controller and power up the robot!
Programming the KeyBot.
To program KeyBot, you can use Arduino IDE which is a bit complicated and requires basic programming knowledge. But if you are a beginner or a student getting into the world of robotics you can use graphical programming to write the codes.
For the graphical programming, you need to install Mixly IDE. You can download it from here. Just scroll down and download the software for your system. I recommend installing the Arduino IDE before as it installs all the required drivers.
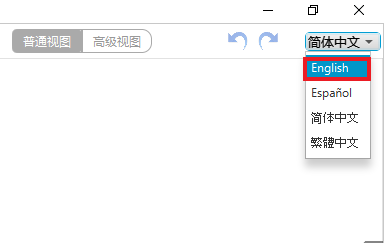
Extract the zip file and open Mixly.exe. You will an application which is in Chinese. To change language, click on the drop-down list menu on the top right corner and select your preferred language.
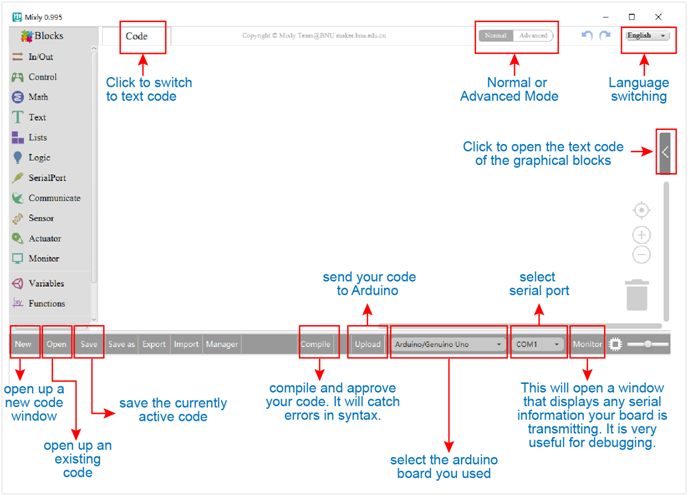
Here is how the UI looks like on Mixly.
You can learn more about Mixly here.
Here we will build a simple line follower robot. We will use the Line sensor to trace a black line on a white surface.
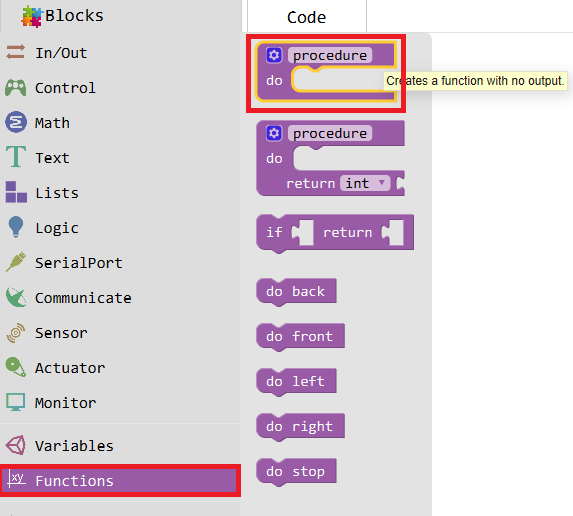
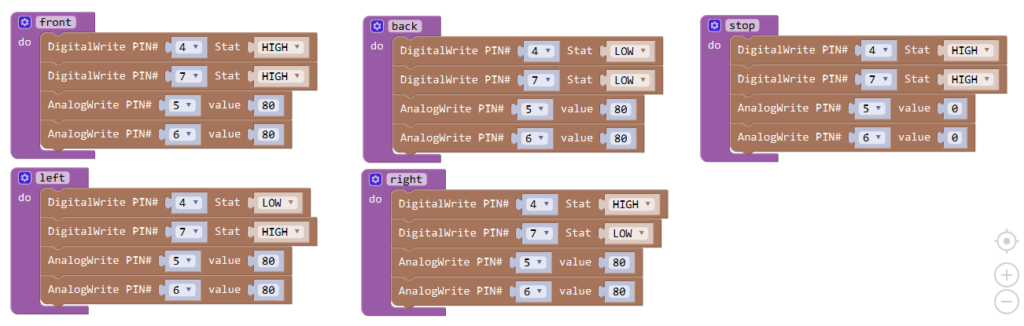
First, we have to create some functions namely: front, back, left, right, and stop. These functions will move the motors. So go to the “Functions” tab and drag “do procedure”. Name the procedure “front”.
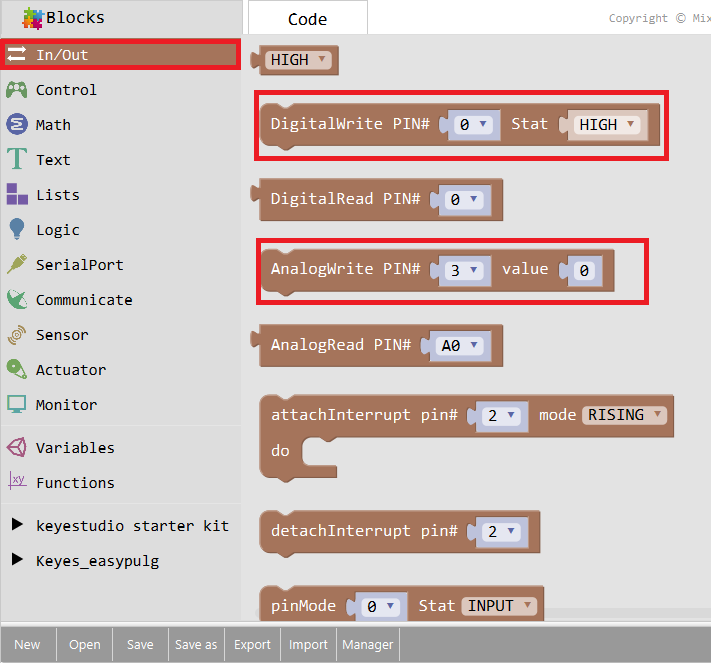
Next, go to the “In/out” tab and drag “DigitalWrite”. Select pin “4” and set it “High”, Again drag a new “DigitalWrite” and select pin “7”. Set it “High”.
Now from the “In/Out” drag “AnalogWrite”, Select pin “5” and set value “80”. Drag another “AnalogWrite”, select pin “6” and value 80.
Similarly, we need 4 more functions. Just refer to the image above and make sure you select the correct pin and set the right values.
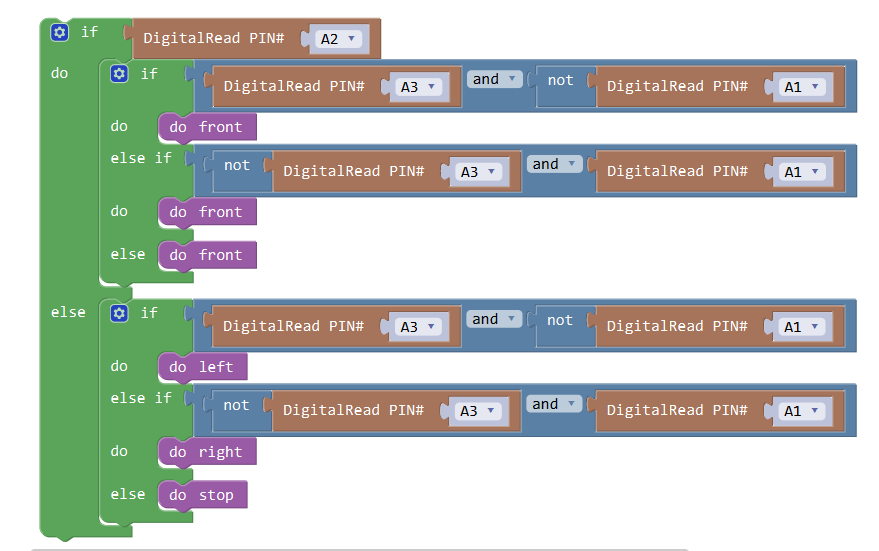
Now have 5 movement functions that will control the motors. Next, we want to make a loop that will call these functions when the sensors are triggered.
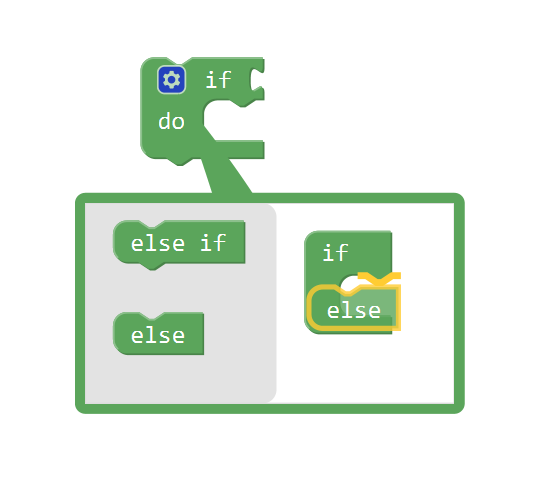
Go to “Control” and select the “if-do” block. Drag it to the canvas and click on the small blue gear icon on it. Select “else” from the dropdown, drag and place it in the if-do block.
Next, follow a similar drag and drop to make the loop. Refer to the image below for details. Again, make sure you use the correct name and values.
Once you have made the loop, click on the arrow on the right side of the screen to pull the Code editor to take a look at the final code.
Note: If you have no prior experience with Arduino programming, you don’t have to do this. The block program is fine.
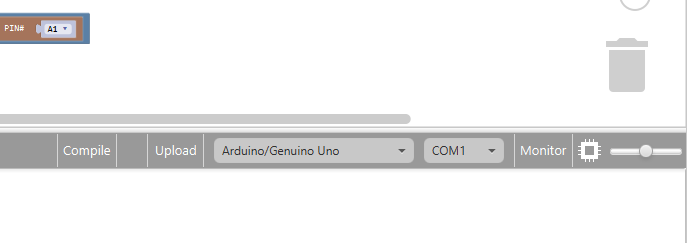
Now it is time to upload the code onto the control board. First, connect the board to your PC using a USB.
In the mixly, Select “Arduino/Genuino Uno” and select the correct Com port. Then hit Upload and wait for the code to get uploaded.
Here is the code file you can directly upload: Line_Follower.mix
Testing the KeyBot line follower.
Finally, we can test how our line follower works. But first, we need a track.
To make the track, take black electrical tape (2cm or 3/4 inch). Make a track with the tape on a white surface.
Now place the robot on the track and power it on. You should see the robot follow the line straight away.
Conclusion.
I have been playing around with the kit for a while now and until now I have successfully made a Line Follower and an obstacle avoiding robot.
The kit provides everything one needs to get started. Assembling is fairly easy. It is a great kit for students who are looking to get started with programming and robotics.
I have been working with Arduino and similar microcontrollers for a long time and I am a big fan of Arduino IDE. I prefer programming in C or C++, but it is quite difficult to understand, especially for children. Graphical block programming is very useful as it is easy to understand and teach. I tried Mixly and I must say it is amazing. The drag and drop interface makes it easy and more understandable for beginners who have no prior programming experience.
So overall I really like this kit and would love to experiment more with it to make different projects.
I hope you like this article and review. If you have any questions, feel free to comment down below.
You can buy your own KeyBot kit from Amazon: Keyestudio’s KeyBot
Also, check out this list of top 10 tools for makers
One thought on “KeyBot: Educational Robot Kit by keyeStudio”